


How to Clean a Beanbag: The Ultimate Guide to Keep Your Favourite Comfy Spots Fresh for Years

Guide to bean bag care and cleaning
A beanbag is often the best seat in the house. Whether its your go-to spot for a lazy Sunday afternoon gaming session, a cozy nook for the kids to get lost in a book, or the preferred snoozing spot for the family dog, these fantastic little furniture pieces take a fair amount of use and abuse.
But lets face it, there will be a few messes and stains. Because beanbags sit low to the ground they tend to collect dust, hair and marks faster than a traditional lounge suite.
If you want your beanbag to remain a comfy little sanctuary rather than flat or even worse, lumpy, then this guide is for you. Here is everything you need to know about keeping your favourite seat looking and feeling like new.
For more options or inspiration, browse our available selection of bean bag chairs to find the perfect fit for your space.
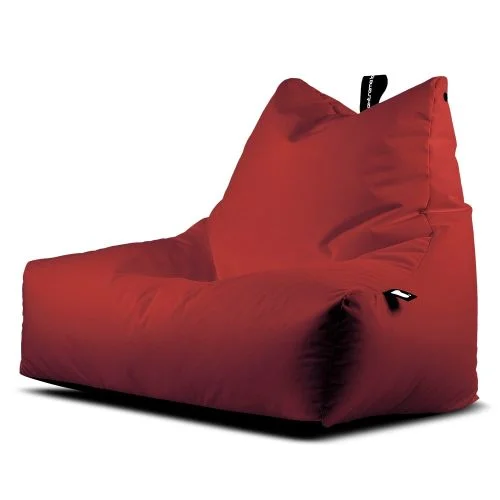
Choosing the Right Fabric
Selecting the perfect bean bag fabric for your beanbag is the first step towards years of comfort and easy maintenance. When it comes to picking a fabric, think about where and how your beanbag is going to be used. For living rooms, cotton or canvas bean bags are a safe bet - they’re soft, breathable and comfy enough to lounge around in any room. If you’ve got kids or pets then faux suede or faux leather are probably the way to go - they’re durable, easy to wipe clean and resistant to spills and stains.
Different fabrics require different cleaning and maintenance techniques, so it’s important to know what your beanbag is made from before you start cleaning. For outdoor beanbags, look for water resistant and UV-protected fabrics that can handle whatever the weather throws at them. And think about how they’ll fit in with the rest of your outdoor furniture and garden setup. These materials are designed to withstand moisture, sunlight and temperature changes, making them perfect for the garden, or a spot on the patio. If your beanbag is made from velvet or other delicate fabrics, keep it away from direct sunlight to prevent fading and maintain its texture. No matter which fabric you go for, always think about how easy it is to clean and maintain. A well-chosen material will keep your bag looking fresh and inviting for many years - whether it's in the living room, kids playroom or out in a sunny garden.
Quick Fixes for Little Accidents
Here are our top tips for quick fixes and spot cleaning your beanbag.
Most of the time your beanbag doesn’t need a full-on clean. Just a bit of spot cleaning will do the trick – and it's especially handy for delicate fabrics like faux fur, velvet or leather that won’t play nice with the washing machine.
Before you start, here are some practical tips for maintaining your bean bag: Always check the care label first and follow the instructions, use gentle cleaning products, and try a helpful tool like a paper clip to open the safety zipper if you need to remove the cover. This makes accessing the inside of your bean bag much easier and safer.
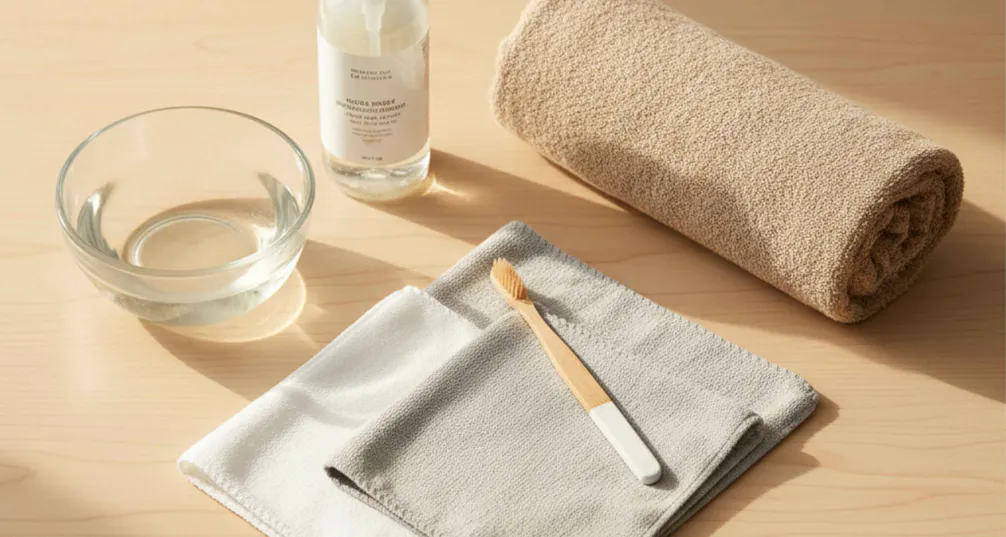
Get Your Spot Cleaning Kit Together
You'll need a clean, damp cloth, a soft-bristled toothbrush or a soft brush and a mild detergent (like washing up liquid). And for tougher stains its a good idea to have a dry towel on hand.
Spot Cleaning Steps
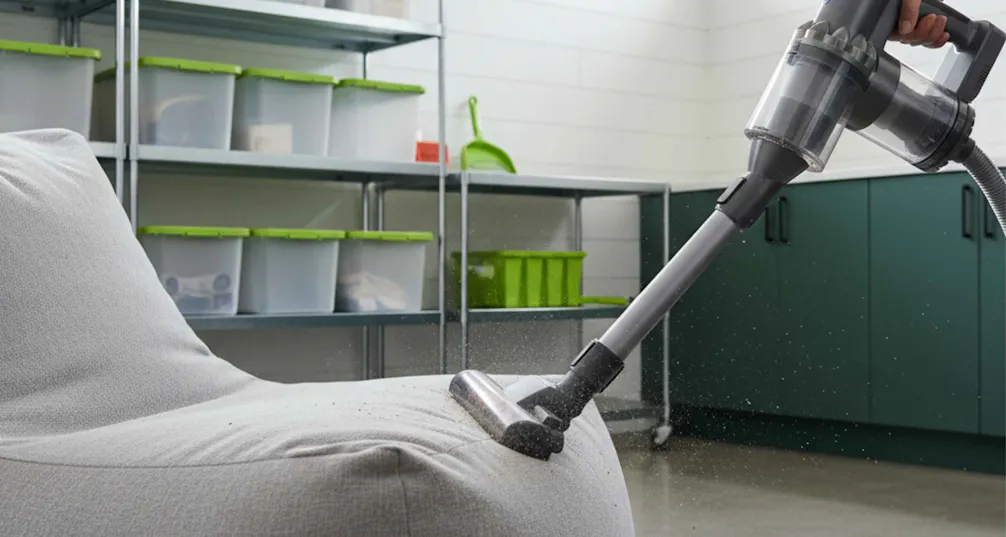
- Dirt and Dust: Gently brush off any loose dirt or dust with your hand, a vacuum or a soft brush.
- Food and Drink: Mix a few drops of dish soap with lukewarm water. Dip your cloth in the solution and give the area a little dab, using a blotting motion to lift the stain. Avoid soaking the fabric.
- Ink or Marker: Blot the stain with a damp cloth and a tiny bit of soap - do a quick test on a hidden bit of fabric first.
Let the area dry completely before using your beanbag again. A wet wipe can be handy for giving the surface a quick clean and getting rid of minor stains.
The Basic Spot Cleaning Kit
Before you start, grab these essentials:
- Two microfiber cloths (one for cleaning, one for drying).
- A bowl of lukewarm water.
- A bit of mild dish soap (clear is best to avoid any colour transfer).
- A soft-bristled toothbrush (for tackling stubborn textured fabrics).
Handling Common Stains
- Food and Drink: Act fast. Blot the spill with a dry cloth. Mix a tiny bit of dish soap into your water and gently dab the area from the outside in to stop the stain spreading.
- Mud and Dirt: Let it dry first. Trying to clean wet mud will just push the dirt deeper into the fabric. Once dry, vacuum the area, then wipe it with a damp cloth.
- Pet Accidents: Use an enzymatic cleaner designed for pet smells. Regular soap wont cut it - these cleaners break down the proteins that make smells linger. Always test on a hidden bit of fabric first to make sure the cleaner wont mess up the colour.
What Not to Do
- Bleach: Avoid using it at all - even on white covers it can weaken the fabric fibres and cause them to tear over time.
- Heating Things Up: Never use a hair dryer on high to speed up the cleaning process. Many beanbag covers are synthetic (polyester or nylon) and can melt or warp if you get the heat wrong.
- Saturating the Fill: A Big No-No - If your beanbag doesn't have an inner liner, be super cautious not to let water seep through to the beads or foam. Waterlogged filling is a pretty sure-fire way to get mould growing.
Deep Cleaning: Machine Wash, But Do It Right
If your beanbag cover is removable and says ‘machine-washable’ on it, a good deep clean every 3 to 6 months can make a huge difference to its lifespan. Before you get washing though, always check the fabric type and the specific cleaning method recommended - it can vary greatly depending on the fabric type.
To deep clean, use a gentle cycle with cold water and mild detergent. You can also use some household cleaning solutions like a mild soap and water to keep your beanbag fresh. These methods are free of harsh chemicals or expensive treatments, making them safe and budget-friendly for regular use.
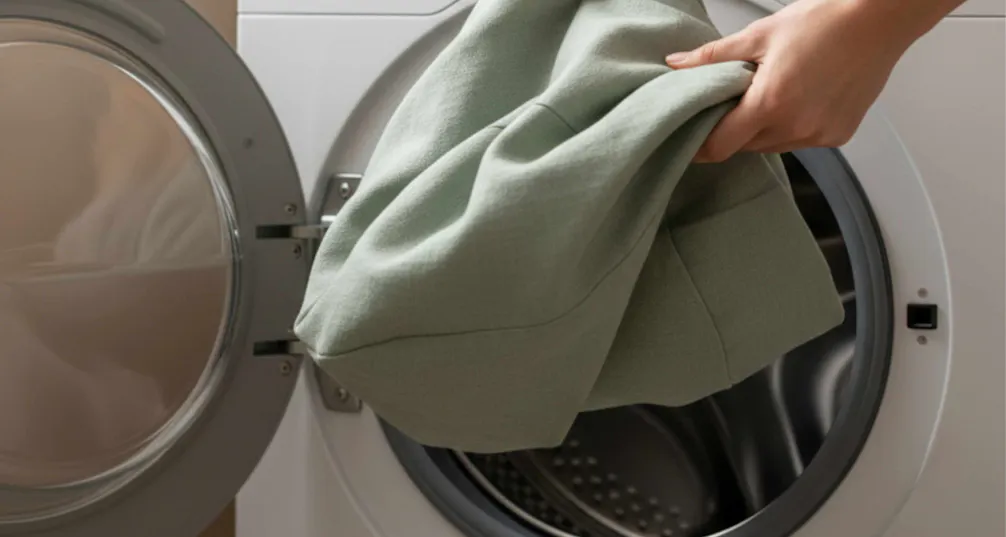
The Great Fill Migration (Removing the Filling)
If your beanbag has an inner liner then you can just take the outer cover off and chuck it in the wash. If the zipper is a bit stubborn have a paper clip handy, you can use that to help open it safely.
If on the other hand it doesn't have a liner, you're going to need to get creative - a large cardboard box or your bathtub will do the trick. Carefully pour the beads (or whatever filling your beanbag has) into the container.
A pro tip you might find useful: Use a dryer sheet to wipe the opening of the bag as you pour; this neutralises the static electricity that makes the beads cling on to everything.
The Wash Cycle
- Flip It Inside Out: This will protect the visible side of the fabric from pilling and stop zippers getting caught in the machine drum.
- Water Temp: Use cold water, its safer for most fabrics. If you've got an outdoor bean bag with a waterproof backing then high heat will probably damage it too.
- Detergent: Mild, liquid detergent is the way to go. Give the fabric softeners a miss though - they can leave a residue on the fabric that will just attract dirt in the long run.
Drying Without It All Going Wrong
Air drying is the best option if possible. Hang the cover over a drying rack or a shower rod and let it dry naturally. If you do need to use a dryer, make sure you use the 'Air Fluff' or 'No Heat' setting - low heat can still be a bit too much for some fabrics, especially those with elastic or synthetic blends.
Putting it All Back Together
Make sure the cover is 100% dry before you stuff the filling back in. Any moisture left in the cover can lead to a damp smell, and getting that smell out of the filling is almost impossible.
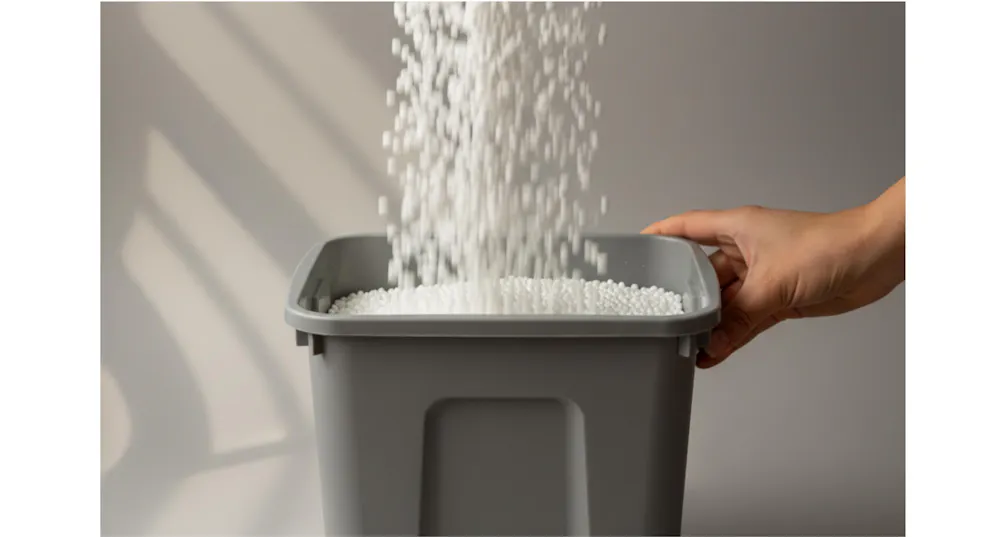
Filling
Outdoor Living supplies bean bag pellets in various volumes depending on the size of your bean bag.
The 5 cubic foot bag of polystyrene is ideal for refills for bean bags, it can fill most small bean bags completely, if your bean bag is categorised as large, we recommend to purchase the 10 cubic foot bags of polystyrene. All our beads are Irish made and made to the highest European standards. Irish Polystyrene is considered to be the highest grade for bean bags and that's why we have selected it for all our bean bags produced in Ireland.
Cover and filling complies to UK and Ireland Furniture Fire Safety Regulations – FIRA
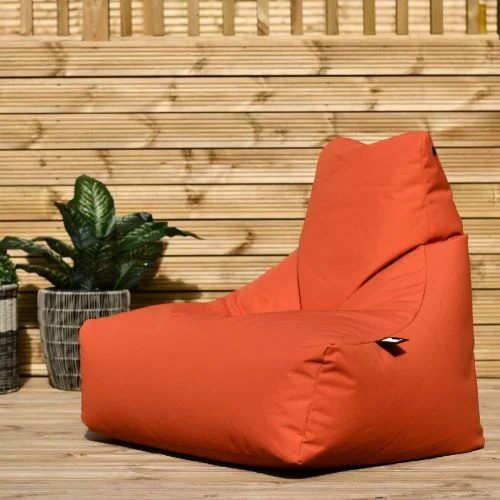


How to Look After Your Outdoor Bean Bag:
Outdoor beanbags are built for adventure, but despite being tough enough for the great outdoors, they still need a bit of TLC to stay looking their best. First off, give your beanbag a good wipe down with a damp cloth to get rid of all the dust and dirt that's accumulated. For the odd stain, you can just use a bit of mild soap and a soft cloth to gently dab away - don't scrub too hard, though. If you've got a tougher stain on your hands, mix some mild detergent with water, then use a soft cloth to gently blot the area. Finish up with a dry cloth to mop up any excess moisture.
When it comes to keeping your outdoor bean bag in tip top condition, there are a few things to bear in mind. For a start, avoid using any harsh chemicals or bleach – these can damage the fabric and fade the colours. Stow your outdoor bean bag in a shaded area, or put a UV-resistant cover over it to keep the sun at bay. And if you do get caught in the rain, don’t be afraid to bring the bag indoors or stash it in a dry spot – like under a garden gazebo or a sturdy canopy. With a bit of TLC, your outdoor bean bag will stay clean, fresh, and ready for relaxation season after season.
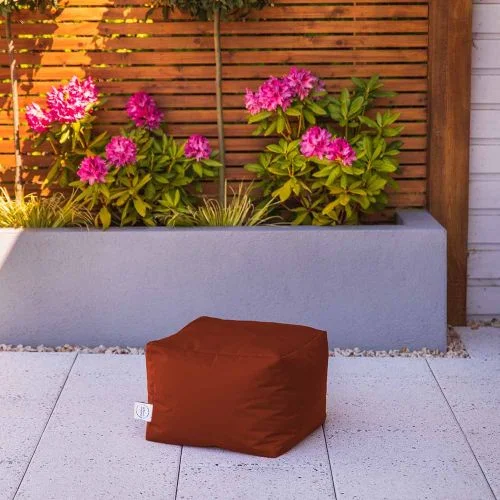
Outdoor bean bags are a stylish and practical way to enhance your outdoor space, making patios, gardens, or terraces more comfortable and inviting.
Repairing and Protecting
If you want to keep your bean bag in good shape, you need to stay on top of the little things - like checking for loose seams, worn out fabric, or a zip that’s seen better days. For minor issues, a quick stitch with a needle and thread can do wonders. And if the outer cover is beyond saving, why not replace it with a new one? It’ll give your bean bag a whole new lease of life.
Using an inner liner and safe filling materials not only makes cleaning and refilling easier, but also enhances the safety of your bean bag—especially important for homes with kids or pets, as it helps prevent accidental access to the filling and addresses concerns about the safety of polystyrene beads.
To keep stains and spills at bay, give your bean bag a coat of fabric protector or a waterproof layer. This is especially useful if your bean bag is a popular spot for kids or pets. If it’s stored on the patio or in the garden, consider investing in a dedicated outdoor furniture cover. If the inevitable happens, grab a towel or soft cloth to mop up the spill right away. Don’t ever rub it in - that just pushes the stain deeper into the fabric. With a bit of care and attention, your bean bag will stay looking and feeling great for years to come.
Long-Term Storage: Keeping the Good Times Rolling
Maybe you don't use your beanbag everyday, perhaps your bean bag is a seasonal thing for the patio or a guest room. Whatever the reason, don’t just toss it into a damp garage and hope for the best. To keep your bean bag in best condition, store it away from heat sources and make sure the filling is secure inside its liner.
After long-term storage, gently brush or steam the cover to restore the nap of fabrics like microsuede or velvet and keep the texture looking fresh.
Climate is Everything
When it comes to storing a bean bag, the environment is just as important as the bag itself.
Don't store it in a place with high humidity (like an unfinished basement) or extreme heat (like an uninsulated attic).
The "Breathable" Rule
Don't seal your bean bag in a non-breathable plastic bag - this can create a perfect storm for mould. Instead, use a large cotton duvet cover or a breathable furniture wrap. This keeps the dust off while allowing the fabric to breathe.
The Dormancy Check-Up
If you're storing the bag for more than six months, take a few minutes to give it a bit of TLC.
- Deodorise: Sprinkle a bit of baking soda on the cover before storage (vacuum it off when you take it out).
- Compression: Don't stack heavy boxes on top of your beanbag. For bead-filled bags, this will permanently squash the beads - leaving you with a flat pancake when you unpack.
Common Mistakes to Avoid
Even the comfiest bean bags can lose their charm if not cared for properly. One of the biggest mistakes is using harsh chemicals or bleach, which can ruin the fabric, cause stains, or even damage the filling inside. Don't throw your entire bean bag in the washing machine or dryer - unless the instructions specifically say it's safe, you risk shrinking the cover or losing that perfect shape.
Another common slip-up is using too much water or soaking the bag, which can lead to moisture problems, mould, or mildew. Don't forget to clean your bean bag regularly - letting dirt, dust, and stains build up will make it a lot harder to keep your bag looking and feeling fresh. And always follow the care instructions that come with your bean bag - gentle cleaning methods are always the best option. If you need to upgrade or get some accessories, take a look at our collection of bean bags and covers to keep your favourite seat a source of comfort and joy for years to come.
Summary Maintenance Timeline
- Weekly tidy: Give the cover a quick once-over a brush or vacuum cleaner and do a bit of tidying up, knock some floor grit off the base so it doesn't work its way into the fabric.
- Monthly check-up: Take a good hard look for any damage - are there any small tears or loose seams? Catching a thread that's starting to come loose now will save a whole lot of grief later - aka the dreaded "bead-pocalypse".
- Every 6 Months: Give the cover a good deep clean , and a quick "top-up" for the bead-filled bags while you're at it.
A well-loved and well-maintained beanbag can easily go the distance - 5 to 10 years is not out of the question - but it all comes down to how well you take care of it - keeping an eye on those small spills and giving it a bit of space to breathe every now and then.